Shade Sail FAQ – Espace Ombrage
To ensure the success of a shade sail project, it is important to carefully assess the available space, the sun’s path, and the mounting points before installation. Choosing the right shape, size, and type of fabric will then provide effective sun protection while adding an aesthetic and comfortable touch to the outdoor space.
Choosing a shade sail to furnish and shade your outdoor space is a popular choice thanks to the practicality, design and comfort of solar fabrics. Buying a shade sail requires making the right choices to ensure the success of your shading project. You need to be able to check that the garden shade sail is properly installed so that it provides optimal protection from the sun's rays and is durable. In this FAQ, we guide you through the process with an expert eye to help you avoid common pitfalls and get the most out of your patio sail.
How to choose the right shade sail?
One of the most common mistakes when purchasing a shade sail is not thinking through the project itself beforehand. Before buying an outdoor sail, you need to carefully consider the layout you want to create. To do this, you need to keep your eyes open and fully understand your needs and your terrace, know its dimensions and identify possible attachment points in advance. Taking into account the sun's path and the orientation of your outdoor space are also criteria that will ensure a successful outcome.
Based on these factors, you can assess the type of fabric, the size and shape of the sail to choose, the location of its attachment points and the type of shade sail fastening (mat for stretched fabric,wall fastening, etc.). Here are a few criteria to consider for a successful installation.
The fabric of the solar sail
When it comes to fabric, you need to pay attention to the quality and material of the shade sail. You need to consider:
- your region: if it is windy, opt for an openwork shade that allows air and water to pass through, considering adding a roller option if you are very exposed to the wind (raised terraces, wind corridors, regions with mistral and tramontane winds, etc.). This way, you will have nothing to worry about once the shade sail is rolled up.
- your future location and the available height: if you want to choose a waterproof shade sail, you will need to create a 25% slope (25 cm difference in height per metre) and therefore have enough height for your attachment points. In addition, a waterproof shade sail will be more susceptible to wind.
- The weight of the fabric, i.e. the weight per square metre. This is a way of checking the quality and durability of the fabric. We recommend fabrics with a weight of 200g/m² or more to ensure effective sun protection. For example, we offer standard openwork shades at 220g/m² (lifespan of 3 to 5 years) and custom-made shades at 340g/m² (lifespan of 7 to 10 years).
Find even more advice on choosing the right material in our FAQ on which material to use for stretched fabric.
The size of the patio sail
When it comes to size, you may encounter a significant problem (no pun intended). This is the case with standard sizes: many people associate the size of their terrace with the size of the canvas. For example, if the terrace measures 4x5m, you might think that a 4x5m terrace canvas is the perfect option. But... in reality, this is not the case! In addition to the size of the sail itself, you must keep in mind that a canvas must be well stretched in order to look good and last a long time.
And to achieve this shade, you need to allow for tension distances (or setbacks) of around 45 cm at each corner to ensure the garden sail is properly tensioned (otherwise you will end up with a sail that is too large and flaps in the wind). Conversely, you may inadvertently choose a garden sail that is too small and does not provide sufficient coverage.
Find even more advice on choosing the right size in our other FAQ.
The colour of the solar fabric
Finally, the choice of colour is a decisive factor when making a purchase. At Espace Ombrage, we are renowned for our high-quality products, but also for our wide range of outdoor shade sail colours, which allow us to meet the different desires and styles of our customers' outdoor spaces. That's why it's important to choose a colour that will complement your outdoor space, to avoid ending up with a shade that doesn't go well with your patio. To help you make the right choice, we provide colour samples so you can be sure of your choice before you buy.
Pro tip: The darker the colour of the fabric, the cooler it will be underneath! Dark colours reduce the effect of the sun's reflection on your patio floor or windows, giving you a greater feeling of coolness.
Find even more advice on choosing colours in our other FAQ.
How to properly install your outdoor canvas?
The planning, location, fabric, size and colour are all set, well done! You've checked everything beforehand and the shade sail is now ready to be installed. Here are our tips to help you avoid the most common mistakes. We explain how to install your shade sail correctly so that it is taut and durable.
When you receive your shade sail, installation is a breeze as long as you follow these steps!
1. Lay your sail on the ground, seam side down and properly spread out so that you can see its entire surface. One mistake that seems insignificant but often happens is simply putting the sail on upside down!
When using an openwork shade sail fabric (such as Australe) and you have a right-angled triangle or a rectangle/square, this will not cause any problems during installation. However, if you have a particular shape with uneven dimensions or a waterproof shade sail (such as Acryl), this is where the mistake will become apparent. You will find that the pieces of the puzzle do not fit together and this may even cause water retention problems (as the seams of waterproof fabrics may store water if the shade sail is installed upside down).
2. Locate your corners: corner A is at the label with the barcode, then corners B and C follow clockwise. If you haven't made the previous mistake, then you won't make any mistakes at this stage (unless you read the time backwards!).
3. Identify the fixing points: you can use the ropes provided to model the tension axes of the sail (diagonals for quadrilaterals and medians for triangles). The fabric must be stretched along these axes. It is therefore important that the shade sail stakes and/or wall fixings are in line with these straight lines. Finally, this is when you mark the recesses to be applied (minimum 45 cm at each corner). Using this technique, you will know how to position the sail and where to create your attachment points.
4. Prepare your tensioning systems (preferably rope and pulleys, such as those we offer in our shop) so that you can easily tension your fabric. Be sure to choose the right tensioning system, otherwise you will not be able to easily attach or tension the garden shade sail. It is even riskier to decide not to use any tensioning system (i.e. to attach the sail directly to the ring) because after a while, the sail will slacken (like any fabric) and you will not be able to re-tension it (because you have nothing to do so with...).
Good to know:
- For entry-level sails such as Australe 220 or Solar 200, you need standard long tensioning systems.
- For higher-end sails such as Australe 340 or Acryl 300, you need reinforced long tensioning systems.
5. Then, using the carabiners and shackles, place your tensioners at the corners of your sail. Find the instructions for installing tensioning systems here. Tip: place your carabiner on the corner of the sail and the shackle on the wall or post so that you can quickly remove your sail in strong winds.
6. Next, attach the other end of your tensioning system to the wall or post.
7. Adjust the tension of the shade sail by pulling on the rope and then lock it in place using the cleat pulley. The sail should be completely flat. You can then adjust your terrace awning without a stepladder by tightening and loosening the ropes locked in the cleats on the pulleys on the mast or façade side.
In this video, we show you the different steps involved in installing a shade sail. We explain:
- the equipment needed to install the sail
- how to locate your shade sail attachment points
- how to drill holes to secure your stretched sail
- how to install the adjustable shade sail pole
- then how to hang and stretch the sail
Our team is available by email at contact@espace-ombrage.com or by telephone on +33 3 62 27 60 60 to answer your questions and assist you with your project.
The natural coconut fiber fabric requires little maintenance. The fiber will patinate in time. It is a summer canvas that will need to be stored in a dry place for winter.
The canopy is supplied with corners. A rope must be attached to each corner to put the sail in tension. You can use the ropes and pulleys to tension the sail but it is not mandatory. Please note that the 300x600cm canopy has 6 attachment points. The canvas doubles in weight when wet.
A rectangular shade sail should be fixed with tension systems along the diagonals of the sail. Do not hesitate to lay your sail on the ground with the seams facing down and use cords to locate the diagonals and the points of attachment in their continuity.
Custom-made pergola covers are available in square and rectangular formats. You can choose a micro-perforated fabric that will let air and water through. If you choose a waterproof pergola sail, it is mandatory to create a slope for water drainage.
You can determine the size of your pergola sail from the size of the existing frame. Remove 5 to 10cm lengthwise and widthwise so that your fabric can be attached to the frame using the black cord provided. The pergola fabric will have straight edges with eyelets every 20-30cm to create a zig zag between the sail and the frame. Provide pergola hooks on your wooden structure if necessary.
The M6 carabiner is supplied with the Australe 220 and Solar 200 sails and is suitable for use with standard long fasteners. The M8 carabiner is supplied with the Australe 340 and Acryl 300 sails and is suitable for reinforced long bindings. The M8 carabiner is not suitable for standard long fasteners.
When you buy an adjustable pole, it includes the tensioning system, the cleat and the slider. The slider allows you to attach the sail to the pole's front or back rail. This allows you to vary the height of your sail throughout the day.
The pole is available in aluminium, anthracite and brown. It all depends on the atmosphere you want to create. You can match the colour of your window frames or choose to match the pole to the colour of your terrace. The brown pole is the most discreet colour and blends in with the natural elements like a tree trunk.
You can choose between several types of base to fix your shade sail pole: to be embedded in the ground so that it can be removed in winter, to be screwed onto the terrace, or to be fixed with wall plates.
The pergola sail will be fixed to your structure using the provided bungee cord. It will pass through the eyelets provided on the edges of the fabric and the structure. Provide hooks for pergola on your wooden structure if necessary. The shade sail will allow you to enjoy your terrace while reducing the heat.
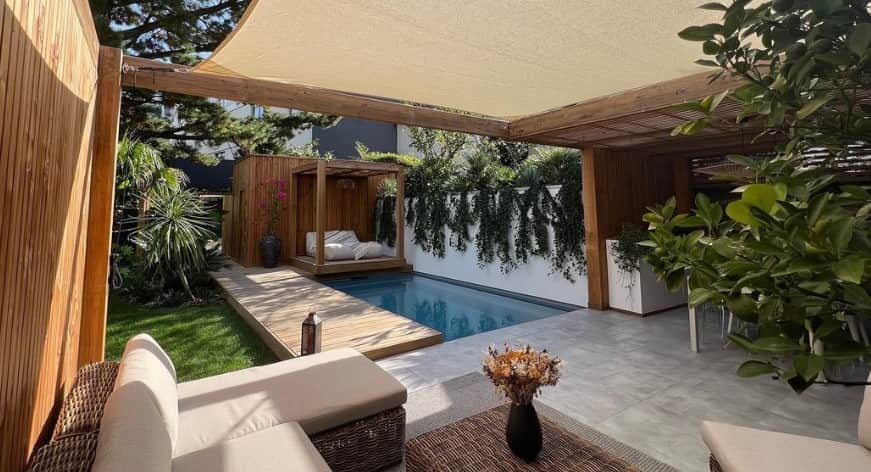
The ideal fixing height for a shade sail is more than 220cm in order to be able to move around and to have a feeling of space under your sail. Remember to include a slope if your sail is waterproof to allow for water drainage.
A shade sail must be tensioned at every corner. You will not be able to tension your sail with a simple carabiner. You should have tensioning systems at every corner of your sail.
The rigging screw has a tension range of 27-35cm depending on the setting. Its travel is only 8cm. It is not recommended as a binding for sails without a furler.
We recommend this wall mount only to fix the roller sail. In all other cases, we recommend tensioning systems with rope and pulleys that will allow you to attach/unattach your sails and to tension your sails without force.
The XL pole is screwed to the ground with its plate. It is completed by a guy to be fixed at the back of the pole in order to reinforce it.
It is recommended to create a slope of 25% when your sail is waterproof in order to create water drainage. The XL pole will allow you to accentuate the differences in the attachment points.
You can attach to walls (wall mounting, adjustable mast with wall plates). You can also choose a ballast support so as not to affect the waterproofing of the terrace.
If you don't want to drill your walls, you can position poles. The poles can be screwed to the ground, embedded in the ground, fixed to the wall or screwed to the ballast support so as not to pierce a waterproof covering or a public place.
You can attach 2 shades sails on the same pole. You will need an additional slider and to position the pole in the intersection of the two tension axes.
A roller shade sail comes in two formats: quadrilateral and triangle. When it is rectangular, the roller is in the diagonal of the sail. When it is triangular, it rolls up on its longest side. When rolled up, these sails have good wind resistance.
We recommend that you lay your sail on the ground with the seams facing downwards so that the sail's attachment points are well positioned in the tension axes. Installation tutorials are available on the Espace Ombrage YouTube channel.
A micro-perforated shade sail can be positioned flat or with height differences according to your preferences. Openwork sails allow air and water to pass through. They must be well stretched to last over time.
Plan tensioning distances of at least 45cm at each corner of your shade sail in continuity with the medians. You can do this by placing your triangular shade sail flat on your deck, marking the medians with cords that will start in the middle of the opposite side, pass through the corner of the sail and continue to determine the point of attachment of your sail. Repeat for each corner.
If your structure is horizontal, choose an aerated fabric, the Australe 340, to avoid the creation of water pockets. If however, your structure allows for a 25% slope, then you have plenty of choices. In case of winds over 60km/h, remember to remove your waterproof cover.
In order to optimize the shading on your terrace, we recommend positioning your poles outside the terrace. Attach your sail at approximately 200 to 300cm-high. Do not go higher as the shade will be displaced from your deck.
The Acryl is available in 25 colours to fit into your world. Surprisingly, the darker the colour of the fabric, the fresher you will feel under the sail.
We produce custom sails up to 28sqm. The sides of the sails are 750cm maximum.
It depends on your needs. Choose a micro-perforated shade sail if you want to be protected from the sun only. These fabrics are more wind resistant. If you want to protect yourself from the rain, select waterproof sails made of polyester or acrylic 300. In this case, provide a slope to evacuate rainwater.
In order to know how to choose a shade sail, notice that the colors of sails have an influence on the rendering. The lighter the sail, the brighter the rendering in your house and the more you will need sunglasses under the sail. The darker the sail, the fresher you will feel under the sail.
The density of a shade sail or its weight is mentioned in square meter. The Australe 340 weighs 340g per sqm, while the Australe 220 sail has a density of 220g/sqm. The UV filtration is superior with the sail Australe 340.
The Australe 220 is available in 13 formats: 6 triangles and 7 quadrilaterals. Plan a smaller sail than your deck to be able to integrate tension distances at each corner (see table summarizing the minimum dimensions of the deck for each sail format).